
Top 25 Things you Need to Know & Learn About Before Buying a 3D Printer
![]()
So you’ve heard about 3d printing and want to give it try. There may be any one of 10 reasons why:
- Sounds like a cool thing to do
- I just want to learn about it
- My friends are doing it
- I need something printed
- My business is getting in to it
- I’d like to start a business printing stuff
- I’m an inventor
- I want to print items instead of buying them
- I like technical stuff
- I can create my own ideas
Any of the above items is a great reason, and in my opinion stick with your reasons and forget all the rest. Over the last year and a half, I have been studying 3d printing and here’s what I’ve found…. “The more I read, all I see is the same thing. People saying… hey you should learn this. Now go here and research it.”
My business partner and I decided to join a group that works with 3d printers so we could learn hands on about what we were getting in to before diving head first. We did, with Fubar Labs located in New Brunswick NJ. They are NJ’s first Hackerspace but get involved in teaching so many different things to people of all ages.
We just didn’t jump in to buying our printers. The other big reason was that we wanted to start extruding filament. That was the easy part but we also wanted to know what would be affected in 3d printing if we did extrude filament. Since our business was going to revolve around a specialty filament, NYLON 12, why not learn what was really needed to do it successfully for the 3d printing community.
So we did it. We started Producing NYLON 12 FILAMENT, a unique and specialty item. After that startup, RDMFilament.com, we also started what we felt was the second most needed business, FubarGlue.com . This wasn’t just because of NYLON 12 FILAMENT characteristics, but we listened to all the 3d printers we met. They were sick and tired of their prints moving, lifting, warping, twisting and turning out badly because the filament wasn’t “sticking” to the 3d printer platform or “bed”. They needed something that worked so we formulated a special glue just for that purpose… You will definitely understand more after reading more about the top 20 items that I’ve assembled here. It’s not all inclusive but we try and give you a really good head start. Take your time reading for two reasons: 1) You’ll learn a lot, 2) There’s a lot to learn…. It will save you time, money, effort and keep you safe in the long run!
Please use the contact us page to send us your question(s) or for more information about our product(s).
[bs_collapse id=”collapse_096-9921″]
[bs_citem title=”1. Types of 3D Printers – FDM, SLS, SLA” id=”citem_d4c4-2e58″ parent=”collapse_096-9921″]
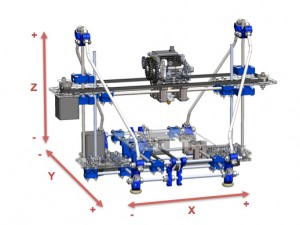
3d (3 dimensional) printing covers a wide range of technologies available not only to the professionals but to the general public. You want to be concerned with FDM (Fused Deposition Modeling) or additive manufacturing. This term means nothing more than taking and melting plastic and depositing it in successive layers on top of itself. It’s nothing more than a sophisticated hot melt glue gun, with a computer, that works like an inkjet printer. The glue, in our case plastic (the correct term being filament) is melted in the glue gun (on the 3d printer this is the extruder). Once it melts you squeeze the trigger and can draw out a line on any object. This is a layer and the computer is the trigger. The nozzle, (where the filament comes out) on both the glue gun and 3d printer has a certain diameter and one of the things that determine the layer thickness. If I keep adding layers with a glue gun, I could, if I was artistic, make a model of something. In 3d printing and on the inkjet printer, the artistry comes from the software that runs it. The 3d part is called an x, y, z plane.
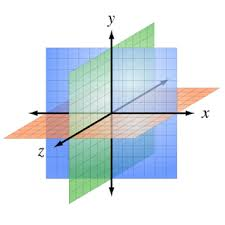
Figure 1: Bed Volume as described by the X, Y, Z Plane
An even simpler visual is, imagine making a 7 layer cake. It has length, width and height. That’s what 3d printing does. (As a matter of fact, bakeries are using 3d printers for their dessert creations…)
SLS – Selective Laser Sintering
This process uses consecutive layers of powder. As a new layer is swept over a defined area, a laser melts the powder just where the part calls for it.
SLA – Stereolithography
This process uses a UV light beam to harden certain areas in a pool of liquid. This liquid reacts to light and thereby known as photosensitive.
[/bs_citem]
[bs_citem title=”2. Price of 3d Printers” id=”citem_d4c4-2e59″ parent=”collapse_096-9921″]

Buying a 3d Printer can be a big investment.
Pricing will vary significantly, depending on what you want and what you need.
Prices for FDM 3d printers vary from $300 – upwards of $3000. Let me say this. I put this at #2 because it’s probably high on the list of everyone’s concerns before buying a 3d printer. I’m saying, this should probably be at the end of the list, not because it isn’t important but at this point you may not have a clue about:
- What’s available
- What do I need
- What’s the cost for each item on your want list
- Can you add it later
- What’s important to have in the long run
- As well as other items.
[/bs_citem]
[bs_citem title=”3. Should I buy a 3d printer kit and build it myself or get one that’s full assembled” id=”citem_d4c4-2e60″ parent=”collapse_096-9921″]
PROs

Lots of things to consider if you don’t buy a fully assembled 3d Printer…
- Save money
- Learn a lot about the inner working of the machine
- Save on repair bills later on since you know the machine
- Help you decide on upgrades you may want to do later
CONs
- Do you have the technical capability to assemble this printer
- Minimum customer support
- Missing or damaged parts
- Can I upgrade it later on
- What will be the final quality of parts using a do-it-yourself kit. This is a personal preference. But like I said in item #2 above, you should wait and see what you need first and what each selection would offer…
[/bs_citem]
[bs_citem title=”4. 3d Printer Bed Size” id=”citem_d4c4-2e61″ parent=”collapse_096-9921″]
This particular 3d Printer characteristic is important for several reasons:
3d beds sizes vary by manufacturer and cost.
- Where are you going to put the printer? Is there enough room?
- Do I want to transport the printer somewhere for either personal or professional reasons, and not just print in my house?
- The larger the bed the more the cost and bigger the machine.
- Let’s say you have a heated bed and the heater breaks… Higher replacement cost. Same if the printer bed breaks.
- A bigger total build bed volume (length x width x height) is not always better.
- Most prints are of a medium to small size.
- Prints larger than 7” x 7” x 7” become difficult to manage and the time to print them becomes astronomical. Also, almost all print should be done in a continuous print.
- Printing in pieces and trying to glue them together won’t work.
[/bs_citem]
[bs_citem title=”5. Quality of your 3d Prints ” id=”citem_d4c4-2e62″ parent=”collapse_096-9921″]
This may not be an important consideration up front, but very quickly you will find out what I mean. I know you’re saying, “I’m just going to be tinkering around, it’ll be fine.” But there are different quality aspects that will affect many aspects of the printing.

Print quality is the most important end product to achieve while 3d printing. Strive for it!
- Instead of a box that you printed looking like a box, it looks like the leaning tower of Pisa.
- After you do your first print it may not look well. Each layer is so predominant and looks funny. Low print resolution
- The physical machine isn’t very stable. The frame is plastic and it seems to bend and wobble when printing.
- I can’t get the printer bed level so my prints are lopsided and warp a lot on the bottom
- I want finer details in my print but the machine just can’t handle it… Need good machine resolution.
- Filament has poor dimensional quality and trapped air or water particles.. Don’t buy cheap filament. You won’t be able to print with it. It will jam the extruder, spit plastic because of the pockets of air and moisture and quickly become your number one source of frustration.
- Extruder Jamming Constantly… Poorly made extruder, poor temperature control can’t handle the temps you’re running and even poor quality filament..
- Poor temperature control.. Bad wiring, inferior electrical parts, bad thermocouple (this reads the temperature of the heating element)
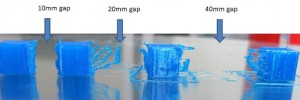
- Prints lifting off the bed… Poorly designed part, wrong filament for the machine, no heated bed, no raft on the part to help spread the “load” and give it greater surface area so it won’t lift or “warp” from the printer bed.
- You’re printing too fast! Based on the complexity of the print, the type of filament being used or the capability of the printer, you may need to slow down. Remember you’re “laying” down rows of semi-liquid filament. It takes time to adhere to the previous layer and “tack up”. So when you put another layer down before the previous one has “set”, it will collapse under the weight and no longer stay where you want it too.
- Machine speed capability is limited.. Depending on the type of motors used and the software controlling them, their acceleration and deceleration of the printer head will play a big role in overshooting, undershooting, misalignment and overall shaking of the printer.
This is so important for lots of reasons. Print Quality can be achieved but you need to know what factors will affects it. Take your time and realize it’s a process like anything else. The more you practice the better you get. But if you don’t put in the time, money and effort, you will quickly become disillusioned about this great technology. Be persistent and enjoy what you are able to accomplish. Some errors are just errors, others take you to another level. Use this experience to motivate yourself to learn more.
[/bs_citem]
[bs_citem title=”6. Safety while using your 3d Printer ” id=”citem_d4c4-2e63″ parent=”collapse_096-9921″]
One cannot take shortcuts when dealing with safety issues while running a 3d printer. You would think that in this day and age there would be a lot of information provided to the end user about product safety. The short of it…. there isn’t. Since the technology is so new and more importantly, constantly changing, safety “rules” and issues have not caught up with the times. So don’t think for a minute that you can’t get hurt if you don’t understand 3d printing technology and just as important the filament you use with it.

Know your machine and the filaments you use.
Don’t take things for granted…
There are many areas you need to be constantly aware of when printing.. That doesn’t mean you shouldn’t print, it just means there are safety precautions you should follow to have a successful and safe experience while doing it.
Here are many of those issues:
- Heated bed & Nozzle… Both of these items are integral to the process and can cause injury. They are both heated and should be treated with respect. Remember even bath/shower water at 140°F will cause burns in 6 seconds, at 150°F it would take 2 seconds to cause a burn and at 160°F it would take 0.5 or ½ of a second to cause a burn.
- Heated 3d printer build beds are generally run at 60°- 70°C or 140°- 158°F…
- The printer extruder nozzle/head generally runs at a temperature of 200°-265°+C depending on the speed and filament used. This equates to temperatures of ~ 392° to over 500°F. Think about how badly and fast a burn can occur. Trying to remove a filament jamb or removing a print or a bit of spider hair inside the machine can be dangerous… Be cautious..
- Pinch Points… The extruder head moves quite fast back and forth on “metal rods”. This is called the carriage assembly. Sticking your hands inside the machine to “quickly remove a piece of filament” of some other reason can get your hand or one of your fingers pinched, jammed or worse. Keep your hands out of the machine. Use a pair of long tweezers if necessary, otherwise you can get hurt. It may look like a small machine but the motors used to move the assembly and/or bed (depending on your machine) are strong.
- Fumes… You will quickly find out that two of the most common filaments to use in 3d printing are ABS and PLA. ABS or Acrylonitrile Butadiene Styrene and PLA or PolyLactic Acid are thermoplastic materials. That means they become pliable and “fluid” above a certain chemical then re-harden again when cooled. That’s great but they do have a safety downside. When they are heated they release toxic fumes. ABS is worse than PLA and you really need good ventilation while printing so as not to breathe in the fumes.
- Food safety… 3d printing enthusiasts are trying to printing just about anything they can. However you need to be aware that if you print items for use with foods or hot materials you may have an issue. Not all materials can withstand temperatures of a hot cup of coffee, let alone be safe to use with food products. So as more and more are being developed, be wary of that.
- Keep surrounding areas clear of combustibles… This should make sense. When you are using a product that can develop extremely high temperatures, having combustible materials close by is not a good idea. Keep the area clean of any debris, paper, flammables, wood and anything that can catch fire. Keep a CO2 extinguisher close by, just in case.
- Toxicity… Many materials have toxic chemicals in them. You don’t want to breathe in their fumes or even the particles they generate that become airborne. As well as emitting fumes, heating ABS and PLA also emits particles. The problem with these particles is that they’re tiny, often well below 100 nm in diameter. They are called Ultra Fine Particles (UFPs). They can get into our respiratory system and in some cases enter our blood stream. Again, use good ventilation practices and know what you are dealing with when using a particular filament or accessory product like build bed glue.
- Tools – Razor Blades, pliers, knives, scrapers etc… You will need these tools especially when trying to remove prints from the printer bed. Also, when “cleaning up a print” of loose material, the raft or unsightly strands you need to be careful when rushing to get the print to look good by scraping and cutting off un-needed materials.
- Bed Coatings – Hair Spray, Acetone based glues? Wow! Are we in a beauty salon? No but quite frankly, very quickly you will see why 3d printing operators use these products. 3D prints don’t always stick well to the printer build bed…This is a known fact. In order to make them “stick” so they don’t move, slide, lift, warp or fall over people have found that they need a material to use for this purpose. Hair spray, once it dries gets very sticky… Here’s the hitch… PEOPLE, this is extremely flammable! If you really think you have to use it be smart. Don’t! It stinks, it’s extremely messy to clean up, can deform the plastic and can catch on fire when not used correctly. The same goes for acetone. A lot of enthusiasts use this to mix with bits of the plastic filament they are printing with to make up a “glue” solution. It does the job but again it’s extremely flammable and shouldn’t be used around hot 3d printer heads and beds. It would be useful to search and use alternatives to these materials such as Kapton tape, Build bed glue coatings such as Fubar Glue.
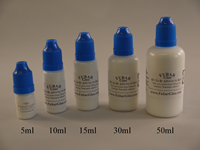
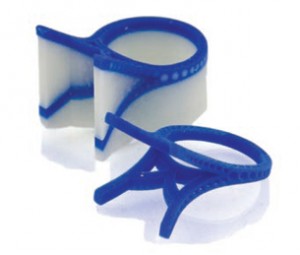
We have (5) convenient Fubar Glue sizes available. Non-toxic and easy to use. It’s specially formulated for 3d Printer Build Beds.
Fubar Glue in 5 Convenient Sizes
Developed for use with Nylon 12 Filament but works with most filaments available for use including ABS and PLA. Also, individuals have used blue painters tape as well with some success.
For now your best option is to be well informed of the risks involved in 3D printing and to enforce your own rules on how to print as safely as possible.
[/bs_citem]
[bs_citem title=”7. Build Bed Volume of your 3d Printer” id=”citem_d4c4-2e64″ parent=”collapse_096-9921″]
Build bed volume is a very simple concept. This is the total volume of space that a print can be made in within the confines of the printer. This tells you how wide, long and high you can make the 3d model or print you intend on making. So if you wanted to print something 12” long and the build bed volume is 7”x7”x7” you can’t do it. This “size” constraint will be just one of the things that determine the price. So you need to consider how large the items you want to print on a consistent basis. This will help you in your final selection process.
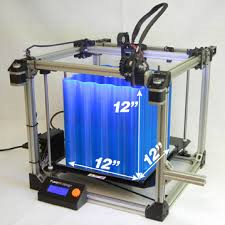
Example of a 3d Printer Build Bed Volume
Remember the following:
- Nice to have a larger build bed volume but the bigger the part the longer it will take you to print.
- Prints generally larger than 200x200x200mm or 7.8”x7.8”x7.8” start to have issues and diminishing returns in time and effort.
- A larger build volume is good though for printing multiple parts on one bed or multiples of a single part on one bed.
[/bs_citem]
[bs_citem title=”8. Consistency of 3d Ptinting” id=”citem_d4c4-2e65″ parent=”collapse_096-9921″]
There’s many things that factor into ease of use and therefore a good looking consistent, or as I like to call it, a repeatable print process.

Machine capability, thoroughness of planning and well designed prints will insure Consistency & Repeatability…
Here’s a list of factors you need to consider:
- Failed prints will be a fact of life for you once you start to print. They will certainly be more prevalent starting out but should become rare once you gain the experience of multiple prints. If they keep failing then maybe other factors need to be looked at.
Consider these:
- What is the printer frame made out of? Generally three different materials have been used to create the mainframe of the printer. They are wood, plastic and metal. Certainly if you can afford it, go for a metal frame. Wood was originally used to cut costs. Plastics are widely available. But when it comes down to have a stable surface to build on and a frame that won’t twist, shake or buckle under the fast movement of the carriage assembly metal is the way to go.
- Build beds… How important are these? VERY! Consider that the layers of plastic that you will be putting down are at heights as thin as 0.1mm. If you have a build bed that is not very substantial then the prints will not be very substantial either. If the bed is not level or is slightly warped then that first layer you print will wind up peeling off, warping, falling or shifting. Like anything, you need a good base to build on. Even the printers that have automatic bed leveling/calibration software can have a sub-par bed. You need both. Make sure you find one that has it.
- In order to get repetitive results consider that these are not sophisticated machines as such. There are no feedback loops for example, that let the computer know that it said to go to this point in space at this xyz coordinate. Did it really get there or is it somewhere else? Are they cheap stepper motors? Does the drive system have a lot of “play” in it? Does is use hardened shafts, a belt and pulley system or lead screw assemblies? What is the overall repeatability of the system? Understand and check these carefully.
[/bs_citem]
[bs_citem title=”9. Print Speed” id=”citem_d4c4-2e66″ parent=”collapse_096-9921″]
In 3d printing there are generally two accepted measures of print speed. There’s the carriage assembly speed–how fast the extruder head moves when it’s printing a layer of filament. 3d Printers “lay down” or extrude layers of filament at speeds from 20 to 150mm per second depending on the mechanical & thermal properties of the printer, printer software, filament characteristics and complexity and design of the part.
The second measure of print speed has do with how fast the carriage assembly moves when it’s not laying down any plastic. This is known as the travel speed – this is the speed at which the extruder head moves between printing points around the build bed. Prints are not formed with one continuous flowing strand of material. You don’t just start at one point and keep extruding out filament till it’s done. This has to do with the software and how it interprets the best way to complete the model. So for example you may be putting down layers of material at a speed of 40mm of material per second. But when you’re not putting down material and moving between points, this is non-productive time. You want to move through these time frames as quickly as possible without sacrificing quality and repeatability. not having the ability to control the speed can yield some very unwelcome results.
Adjusting Travel Speed can be the difference between a great and a bad print.. Slower travel speed allows more product to drip between points of contact…
Many 3D printers now employ acceleration/deceleration firmware on extruder head carriage assemblies. This is what generates higher print speeds. The path of the extruder head often consists of abrupt changes in direction. Without changes to the acceleration and deceleration of the carriage assembly, long term damage to the 3d printer can take place. Having the ability to control these rates greatly increases the longevity of the printer and quality of the prints will not suffer.
[/bs_citem]
[bs_citem title=”10. Community Support ” id=”citem_d4c4-2e67″ parent=”collapse_096-9921″]
There’s Plenty of Help not only to get you started but to direct you thru some tougher times…
Like anything else when you need help where do you find it? Fortunately in the 3d printing world there are many blogs, communities, manufacturers and support groups available to help you understand, learn, practice, identify issues, teach and generally support this whole new platform called 3d printing. Getting involved in these groups not only helps you get thru the process of learning this new technology but provides others with the same support for the same issues that you have.
Here are some good places to start getting answers and more importantly for you to keep up with the latest information and changes that are available. Remember this technology is changing so fast that what wasn’t available 6 or even 3 months ago may be mainstream for use now…. Keep looking and stay in touch with the forums. Here are just a few of the better communities to join…
- Hackaday.com
- 3dprintingindustry.com
- 3dprinting-blog.com
- 3ders.org
- Shapeways.com/blog
- 3dhubs.com
- Makerbot.com/blog
- 3dprintingforbeginners.com
There are certainly many more and should check them out and join them. It will really help out in the long run. 3D Hubs 3D Printer review page gives a rundown on 3d printers. It is great site overall and has a terrific 3d printer buying guide.There are so many people 3d printing and you certainly aren’t the only one with problems and issues that need fixing. Take advantage of all their mistakes so you can quickly get up to speed and enjoy your new machine. One watch out though is that if you are thinking of buying a particular brand of printer and there aren’t any or it’s small or only one or two community groups, that may be a red flag that you might want to reconsider your pending purchase.
Look for an active community discussing the printer and whether the company has a good customer support system in place.
[/bs_citem]
[bs_citem title=”11. Don’t be fooled by Proprietary Filament for your 3d Printer ” id=”citem_d4c4-2e68″ parent=”collapse_096-9921″]

Know all your options before quickly buying a 3d printer..
Buyer Beware! There are some companies that have designed machines to be able to only use their filament and there is absolutely nothing wrong with that. I think that you need to be made aware of that before buying a particular 3d printer. Finding out after the fact may not be something you want to deal with every time you need more filament for your printer.
Some manufacturers have special “cartridges” you need to be able to attach to the printer. They may all use “special spools” with chips similar to some inkjet printers. If you don’t buy their spool with the chip in it, it won’t work. Some use proprietary filament which is significantly more expensive! Proprietary filament is a custom filament which must be used to fit a specific machine. They’ve even gone so far to put on a smaller than industry standard size spool into their machine. It has a chip and reads not only that it is their spool but keeps track of how much you use off of it. When it’s empty you can’t just rewind more filament on it and keep printing. It won’t let you. Don’t fall for any of it, they are designed to create another source of income for the company and in today’s world who wants that.
[/bs_citem]
[bs_citem title=”12. Material Guidelines for using a particular filament” id=”citem_d4c4-2e69″ parent=”collapse_096-9921″]
Filaments are all different. These materials can be brittle or strong, flexible or solid, smooth or rough, heavy or light, hard or soft and so on. Therefore, an object should be designed for a specific material. For example, if you know that you want to print your 3D model in ABS there will be specific design guidelines that you need to take into account. Overhanging parts, elements that are sticking out, rounded off corners, etc. may need to be looked at before you get into part design.
The choice of your material simply determines basic design guidelines that you need to stick to. Each 3D printing material is different. You can read some of the available design guides for the material of your choice before you begin.
- blog.tinkercad.com/materialsguide/
- i.materialise.com/materials/design-guides
- 3dhubs.com/materials
- shapeways.com/materials
- sculpteo.com/en/materials/materials-design-guidelines/#
- formlabs.com/support/software/design-specs/
There are many others but these are a few websites to get you started. Sticking to the design rules of your material is essential for a successful print. You should also do side by side comparisons between several materials you may be considering so that you come up with the best combination for the design, use and quality of print you want.
[/bs_citem]
[bs_citem title=”13. .STL Files ” id=”citem_d4c4-2e70″ parent=”collapse_096-9921″]
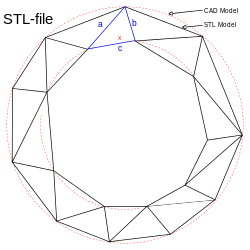
3d Prints are rendered into .STL files so the printer can convert them into a “real time” model.
This file name extension, from the word STereoLithography, is a file format native to the stereolithography CAD software created by 3D Systems. This file format is supported by many other software packages and it is widely used for rapid prototyping, 3D printing and computer-aided manufacturing. STL files describe only the surface geometry of a three-dimensional object without any representation of color, texture or other common CAD model attributes. The model itself is broken down to a series of triangles and a list of their XYZ coordinates is used by the printer to create the physical object, layer by layer. The STL format specifies both ASCII and binary representations.
Bottom line, after a software model is created thru one of the popular CAD programs, the .STL file is generated and then eventually used in the 3d printer to print the final model.
[/bs_citem]
[bs_citem title=”14. Generating a 3d Print Model” id=”citem_d4c4-2e71″ parent=”collapse_096-9921″]
Do you know how to use a computer program to generate a CAD drawing? When it comes to getting a 3D model you can create it yourself or download a pre-made blueprint from the Internet. If you intend to create your own model you need to learn/use a software program that will generate a final .STL file format to use with your printer. There are many software programs, both free and commercial, that can generate the file that you want.
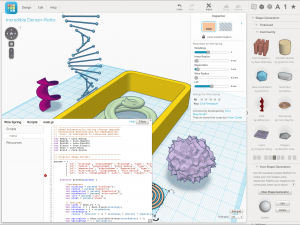
Using a free CAD program like TinkerCad will help you generate the prints you want…
Here’s a good website that offers a list of Free 3d Software, Commercial 3d Software and Free .STL Software. 3ders.org || 3d Cad software list… Besides providing this great software list, they are a terrific site with lots of information and tools to help all 3d printing enthusiasts and first time printers alike… Check them out.
Learning to create a model using computer CAD software is a difficult task that will take time and effort to truly get used to. Fortunately there are lots of websites providing the 3D model files for a multitude of products. Here’s a website that provides a great list of these sites. 3dprintingforbeginners.com || 3d Model Repositories. However, if you know you want a particular item you should Google it to find it. It may be a faster search.
[/bs_citem]
[bs_citem title=”15. 3d Printing Slicer Software” id=”citem_d4c4-2e72″ parent=”collapse_096-9921″]
What the heck is this? It’s not that complicated. Once you have an STL file of the item you want to print, you will have to put them through slicing software. This program tells your printer how to print your model. It gives instructions on specific items like the number of layers it will need to print, where to start the print on the build bed and how parts of the model should be made. For example, should they be solid or hollow?

A slicer program creates, (in code) layers of the Print to be extruded in the final model…
Here are two of the most used Slicer Software Programs:
[/bs_citem]
[bs_citem title=”16. Types of Filament to use in your 3d Printer” id=”citem_d4c4-2e73″ parent=”collapse_096-9921″]
Wow… This is a BIG subject. First you should ask yourself; “what kind of things do I want to print?”
If you wanted to make a small figure, box, artistic item or something whimsical like a funny looking pen and pencil holder, what kind of material do I want to use? This brings us to the types of materials used to make the filament for 3d printing.
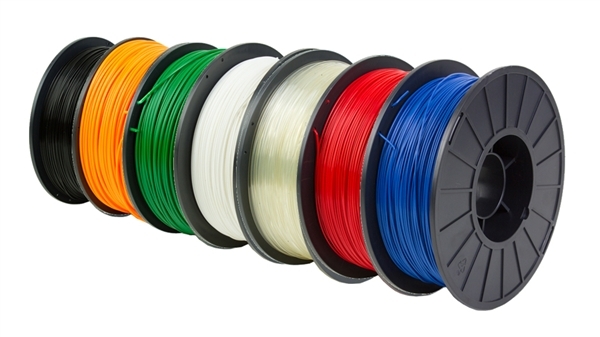
When 3d printing first started out there were but one or two “filaments” that could be used to print. Today there are many different materials available!
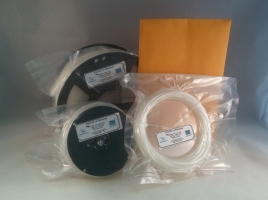
Specialty Nylon 12 Filament Multi-Product Packages. By: www.rdmfilament.com
Nylon 12 Filament in 3 convenient sizes
- ABS (Acrylonitrile butadiene styrene)
- PLA (PolyLactic Acid)
- PET (Polyethylene terephthalate)
- NYLON (6, 6/6, 6/10, 6/12, 11, 12)
- HIPS (High Impact Polystyrene)
- PVA (Poly Vinyl Alcohol)
- WOOD Chip filled filament
- PETT (Polyethylene Terephthalate)
- Polycarbonate
- TPE (Thermoplastic Elastomer)
- Metal Filled
- PLA w/ Coconut
- PLA w/ Cherry Wood
- PLA w/ Bronze, Copper, Brick and many other blendsAnd the list goes on and on. There are many others including specialty filaments, and the list collapses every day. If manufacturers can formulate it for use in 3d printing and it offers some unique properties, they will extrude it.So how do different filaments affect my choice of materials? Well first, all printers are not created equal. Every printer cannot print any filament you may want to use or you may not want to invest in a particular filament for various reasons. Things you absolutely must consider:What you need to know is that each of these materials has different considerations:
- Cost/Roll… As you venture to look around the web you will invariably see not only a range of filament materials available but a wide range of prices on those materials. Some of those costs are purely marketing from a well-known brand. Most of what I have seen & read about including comments from individuals that have tried many of these filaments is that the cost of the item does directly relate to the quality. Much of the material being sold is from China. The quality is still questionable but pricing continues to drop. According to many reviews the better filaments seem to be produced in the US & Europe.
- Filament materials… What materials are actually being put in to the mix when it’s extruded? Plastics are not just plastics and when mixed together can produce random and unpredictable results.
- Additives are incorporated that do not suit the end product and make it more difficult to work with and are in the filament just to reduce the cost.
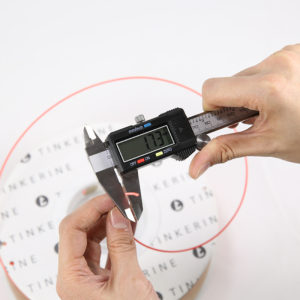
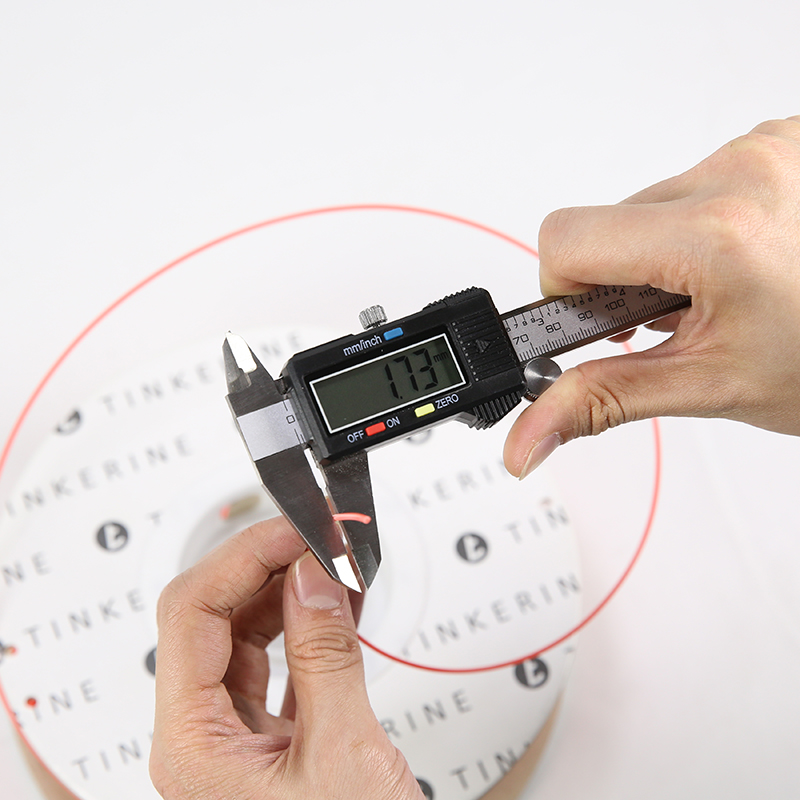
Consistent filament diameter has a direct connection to the final quality of the print…
- Additives are incorporated that do not suit the end product and make it more difficult to work with and are in the filament just to reduce the cost.
- Is the diameter consistent @ +/- 0.05mm or less so it makes it through the extruder filament feed? Is it oval shaped or concentric? It’s not getting the quality checks that a better filament will get. If a 3D printer is designed for 1.75 mm filament, it needs to be very close to that measurement: too wide filament could jam the extruder and too narrow filament could lead to extruder gears losing grip and extruding inconstantly, resulting in lower-quality prints. Don’t buy cheap filament.
- Is there a lot of dirt in the product messing up the final prints?
- Getting a lot of jambs in the extruder head? Inconsistent product, bubbles of air and too much moisture in the filament can be issues from the manufacturer when extruded or in your own storage habits.
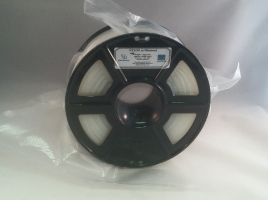
Nylon 12 Filament 1Kg Roll of Packaged in Vacuum Bag with desiccant. Product by: www.rdmfilament.com
- Is the material shipped correctly to prevent not only damage, but to eliminate moisture absorption? Since all plastics will, to some extent, absorb moisture. This is a leading contributor to poor quality prints and jambs. Your filament shipment will most likely include a small white packet of desiccant – a moisture-absorbing substance. When not in use, filament should be kept in a sealed container or bag with the desiccant or, as some forums have suggested, dry rice. Filament will easily absorb moisture in the air, and as these bubbles of moisture pass through the heated printer head (often 400F – 500F), the superheated steam will cause tiny explosions, leading to inaccurate printing or even print head damage.
- Physical Spool size – Every printer has its own way of attaching/holding the filament spool while printing and can usually accommodate a wide range of spool sizes. Some vendors design their printers so they can only hold their own proprietary filament. One line of printers is designed such that it can only hold their own very wide and flat spools, while others, even use dedicated cartridges instead of spools, so you can only use their brand, comparable to 2D printers.
- Quantity of Filament on the spool. The industry standard seems to be a 2.2 lb. or a 1Kg roll. Others spool rolls of 1lb. and 1/2lb. rolls as well. Check the net weight of any size spool before you compare and buy. Sample packs are even more of an issue when it comes to cost. Companies put out samples from several hundred grams to 10m of product and charge ridiculous prices…. Be smart and advised.Here are many of the other characteristics you need to be aware of when using and/or deciding what filament to use:
- Filament materials… What materials are actually being put in to the mix when it’s extruded? Plastics are not just plastics and when mixed together can produce random and unpredictable results.
This is due to several factors:
- Does it have good mechanical properties: Why should you care? Well after spending a great deal of time buying your printer, learning how to use it and creating a file for you print, wouldn’t you like to have a finished print that can actually be used without falling apart? Of course. But depending on what you plan on doing with the part you need to select the correct material for use. This is called design for use. Different material filaments sometimes have very different printing properties as well as what I’ll call “structural and use properties”. Here are some of those characteristics: Does it have….
- Good impact strength… Which is the capability of the material to withstand a suddenly applied load and is expressed in terms of energy. Will the part you create be taking a lot of abuse?
- Good Tensile Strength… The measurement of the force required to pull on or stretch something such as filament to the point where it breaks. Maybe you want to create a hook for something. Will it stand up to the test?
- A good temperature range that the material will stand up to, for example outdoor use (0° to 100°F).
- What is its melt temperature? The melting point (or, rarely, the liquefaction point) of a solid is the temperature at which it changes state from solid to liquid at atmospheric pressure. At the melting point the solid and liquid phase exist in equilibrium.
Poor layer adhesion is due to many things. Tops are poor/wrong temperature control, bad filament, print speed or print design.
- Good layer to layer adhesion or will it snap apart at the first sign of use
- Durability or will it snap quite easily
- A high shrinkage rate that you’ll have to compensate for in the part design and software?
- The need for a heated 3d printer bed? This is necessary to make sure your filament doesn’t pull off the bed. The heat will help keep it attached.
- A low melting point that will cause my print to deform under high heat
- Good properties that would allow me to make snap-fit or interlocking parts or is it really difficult to work with and make tight joints?
- Good flexibility… I might want to make a case for my phone or parts for my drone and don’t want them to snap when I drop my phone or land my quad copter…
- Any properties that might not want to deal with like fumes or airborne particles that are created when it’s heated?
- The necessity of finishing some prints. Some materials need to be sanded, polished, vapor-smoothed, painted or finished to get interesting or good results, some don’t.
- How about compatibility between filament material and your 3D Printer and Extruder Type. Read both your printer’s manual and warranty conditions before using these materials. Some filaments can seriously damage certain extruders and because of this, printer manufacturers won’t even allow the use of different filament brands other than those they’re selling

- Can the machine handle the requirements of the filament that I want to run like:
- Melt Temperature of the plastic- will my machine be able to reach this requirement, or will the extruder head fail.
- Will my nozzle handle additives like “glass filled” or “metal Blends” without jamming
- Will the material be capable of being pulled off the spool without slipping because it’s too soft or too hard
- Print Speed: This is the recommended print speed of the filament. Some will have to be printed extremely slow for good results.
[/bs_citem]
[bs_citem title=”17. What Color Filament Do I want to Use?” id=”citem_d4c4-2e74″ parent=”collapse_096-9921″]
This may seem like a trivial characteristic to talk about but this is really something to consider.
Multiple colors of filament are great. Using the different colors though can be challenging…
If you want more than one color of filament to work with you really need to consider these facts:
- Multi-colored prints are nice, but changing out the roll from one color to another is not as easy as 1-2-3 and to tell you the truth it’s nearly impossible to do. Plus it will mess up your print if not done correctly.
- Prints without multi-head extruders don’t lend themselves to good quality color prints.
- After changing colors you need to “purge” out the old color before starting your print again.
- Having a machine with a dual head extruder really opens up the possibilities of what you can print and ultimately what it will look like.
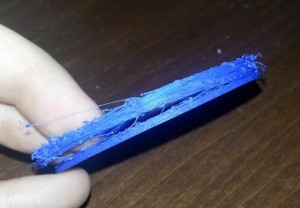
You could use a material like Nylon 12 Filament. This material not only has great characteristics, low moisture absorption, chemical resistant properties, high abrasion resistance, great impact strength, elongation properties and weather capabilities but can be colored after you print with “RIT” dye or a leather dye like “Fiebings”. You can also dye it before hand with the same dyes and there are YouTube videos to help you along.
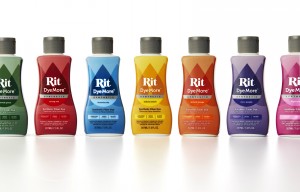
Rit Dyes – Great dyes to color your own 3d nylon prints…

Use Fiebing’s dye to color your Nylon Prints before or after printing…
[/bs_citem]
[bs_citem title=”18. 3d Printer Layer Thickness (or Vertical Rsolution)” id=”citem_d4c4-2e75″ parent=”collapse_096-9921″]
This is the minimum thickness of each layer that the printer is capable of extruding in one pass across a printer bed. The smaller the layer thickness, the smoother the outside facing the printed object will be. This allows plays an important role in the quality of tight dimensions you may need to have in your print if making, for example, parts that need to snap together. There is a time cost however, because it will take longer to print the part since the printer has to extrude more layers.
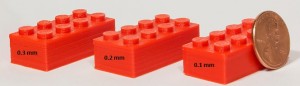
The thinner the layer, the more finished the part will look…
FDM printers typically have a layer thickness of 0.2 or 0.3 mm, and more expensive ones can output as thin as 0.1 mm. Others allow you to adjust layer thickness so you can print drafts (quick prototypes) at higher speed.
[/bs_citem]
[bs_citem title=”19. Resolution (X and Y) of the 3d Printer” id=”citem_d4c4-2e76″ parent=”collapse_096-9921″]
The more you can control the movement of the printer head, the greater the detail you can attain
The horizontal resolution dictates the minimum tracking movements the extruder can make while printing a single layer. The smaller the value, the higher the level of detail the printer produces. XY resolution should not be more than 0.3 mm.
[/bs_citem]
[bs_citem title=”20. Printer Size” id=”citem_d4c4-2e77″ parent=”collapse_096-9921″]
Some of you may be thinking about bringing your 3d printer to trade shows, seminars or even just over to a friend’s house to test out some new ideas. That’s great but the machine may be extremely heavy and not very well suited to doing that. You may want to get a very simple machine, lightweight so you can do that. The larger more sophisticated machines won’t take well to being constantly moved around. Just a thought…
[/bs_citem]
[bs_citem title=”21. 3D Printer Upgrades” id=”citem_d4c4-2e78″ parent=”collapse_096-9921″]
I might expect that this may never cross your mind. But if you’re in it for the long haul and don’t want to keep buying printers as the technology quickly advances, then buy from a company that will support backwards compatibility with their upgrades and use common parts so the older generations can upgrade to the newer ones without buying a brand new machine.
You should also consider whether or not you can change or upgrade (flash) new software onto the board that comes with your machine. As you learn about the capabilities of the machine there may be things you want to change, tweak or maybe even eliminate. There are many things that can be changed but if the board can’t be “flashed” you’re out of luck.
[/bs_citem]
[bs_citem title=”22. Support Material” id=”citem_d4c4-2e79″ parent=”collapse_096-9921″]
Support material or “scaffolding” is necessary when creating items that will normally collapse under their own weight while still hot. It is removed after the print is completed & cooled.
No it’s not about books or technical papers on 3d printing. Scaffolding as it is called in 3d printing is material used in the model to fill voids created during the printing process to support the object so it doesn’t collapse. FDM type printers require this support structure to be printed along with the model to support any overhangs or undercuts. If your printer isn’t able to create support structure for you automatically, you will be required to design the structures yourself. This is a time consuming process.
However this material is removed after the print is completed. The most common material used for scaffolding is PVA (Poly Vinyl Alcohol) and is soluble in water. So if you have a model requiring this material, you simply put the part into some luke-warm water and it will dissolve leaving you with the final print. Also, if you are creating complex parts that require scaffolding then you will need a 3d printer with two extruder heads. Working with the PVA is a lot more challenging than regular filament and you can’t keep shutting down and changing out your regular filament with this material. This will have serious consequences on the quality of your print. Understanding how the software creates this scaffolding will help you understand the process much better.
A basic rule of thumb is that a model, without scaffolding, shouldn’t print material at greater than a 45° angle. Otherwise it will collapse.
The software sometimes doesn’t create the scaffold all in one shot. It might, but then for that model it wouldn’t be considered a “complex” print. Usually, there may be many areas within the model that may need to have scaffolding, that’s why the need for at least two extruder heads. Just something to consider….
[/bs_citem]
[bs_citem title=”23. Using Infill with your 3d Model” id=”citem_d4c4-2e80″ parent=”collapse_096-9921″]
After you become familiar with some of the technology and the jargon used in 3d printing, you will inevitably come across the term “in-fill”. At first glance this may seem to be another way to describe “scaffolding” but it’s far from it. Here is a great display showing what infill is from MY3dMatter.com:
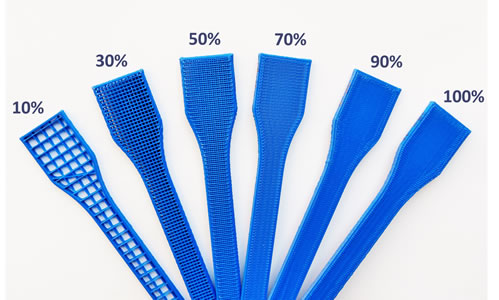
A great illustration of the same part using from 0-100% infill..
So what this “infill” material does is give the piece strength. There may be times you want to print a completely solid part, but many items don’t need to be. For one thing it will use a lot more filament and printing time to get the part completed. It’s like a wall in your house. The wood beams are generally 16” apart from each other. Now you could build a wall that has the beams let’s say only 12” apart. The structure where the beams are closer to each other provides more strength to the wall. But if I don’t need the extra support, why use it? It’s the same with your parts.
So what’s the caveat? Sometimes the amount of infill you need to create parts is overlooked. There are three things to consider when you’re designing or setting up your part to print. First of all, the filament you choose will dictate how much you will need. ABS is “strong” but is very brittle so it would require more infill than PLA for example. Using one of these two materials would require anywhere from 20 to 50% or more infill depending on what you intend on using the part for. If you were to use Nylon, such as our Nylon 12 Filament, you could be printing with as little as 12-15% infill and get better results, depending on the part and where you will use it.
Secondly, how strong does the part have to be? Let’s say you needed to print a bolt and nut to use in a situation that’s going to be used quite often and take a lot of daily abuse. Certainly, you want this part to last and would use more infill to be able to stand up to rigorous use.
Finally, the last situation where you need to check the amount of infill is when you are using someone else’s design print. They may have just wanted to create the part for “fun” and didn’t consider infill at all. So this is something you need to review before creating/using the part.
[/bs_citem]
[bs_citem title=”24. Don’t ignore the obvious when 3d printing your parts” id=”citem_d4c4-2e81″ parent=”collapse_096-9921″]
Although there are other considerations for you to think and learn about, the following few items should complete your first steps into the world of 3d printing.
Wall Thickness
Even though you can find information about the wall thickness in the guidelines that were already mentioned, it’s worth stressing this point again.
- Problems linked to wall thickness are most common but easily fixed reasons why some 3D models are not printable. If you design parts where the walls are too thin, making small parts on the model to be printed will be too fragile and could break off easily. On the other hand, walls that are too thick can generate too much internal stress and could cause the item to crack, warp or even break.
Getting the right wall thickness is crucial for a successful print.
File Resolution
Read the design guides and know your material.
For 3D printing, the most common file format is STL. Most 3D modeling software has the option to export your designs to an STL file and set the desired resolution. Here’s a visual representation of different file resolutions from extremely high (left) to quite low (right) use the Autodesk Inventor Software CAD program:
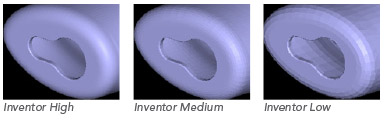
Resolution does play a large role in the final quality of parts. The lower the resolution the more “unfinished” the part will be.
You can see the difference in the final “quality of print”. With the low resolution the cutout and the body of the print is very rigid looking and certainly not a smooth as it could be using the “high” resolution .STL file.
Printer Calibration
Some printers, even the high priced ones, can be delivered “assembled, ready to go” and not be calibrated at all.
Before using:
- Check that everything is square. Try to get everything horizontally and vertically straight. The X, Y and Z axis should all be at a 90 degree angle to each other. This is actually still quite hard to do. Use a square.
- Then the same thing goes for print size calibration. Print a bunch of cubes and test them. Measure and check it they are straight and have the dimensions that you wanted. When you print a 20mm cube, is it 20mm when measured? If not you may need to check if it’s a calibration issue with the machine. This can also be tricky to track down. Sometimes it may require an adjustment in the “steps per millimeter” settings in the firmware (more likely if you have built up a 3D printer yourself or from a kit) and very often it’s just down to over extrusion of material causing an over-stuffed object. Experiment with different extrusion rates. It’s often better to be 10% under extruding than any level of over extruding.
- Make sure the pulleys or belts are not loose
- See that the bed is level
- Are the motors secure?
- Are the shafts that the carriage assembly rides on, straight and tight?
- Has the nozzle been calibrated to the table to make sure it doesn’t scrape or hit it?
- These machines are complex, and issue surface for a variety of reasons. For example, a filament that won’t feed may not only be caused by a “bad” feed system or a damaged gear, but maybe by a blocked nozzle, a wrong feed value or a too high/low extruder head temperature. Knowing how to diagnose the printer is a huge step forward for a rewarding experience.
Stop focusing on one issue
- In general, don’t take anything for granted. Check out everything before using the machine. Heck, it’s also another way to learn about the physical makeup of the printer.
[/bs_citem]
[bs_citem title=”25. Pricing your new 3d Printer” id=”citem_d4c4-2e82″ parent=”collapse_096-9921″]
 Now it’s finally time to price out what type of printer you should really buy. I said at the beginning of this white paper that I wanted to leave this topic to the last. There are so many things worth considering whether you’re a weekend hobbyist or a full time printer. Either way I hope that the list of items we’ve discussed gives you an idea of not only what’s worth looking at to incorporate in your printer, but items you want to incorporate into your purchase.
Some items are “nice to haves”, while other can seriously make printing a lot easier. I can’t stress enough about thinking for the longer term when buying a machine. A simple machine is great and will get you up and running in short order, but, you will realize very quickly that just printing some items pre-loaded into the computer by the manufacturer gets old really fast.
- Have a budget but don’t necessary run right out to get it. You may want to save up more money to get those extras that seem intriguing to you instead of doing without.
- Price doesn’t always mean Quality or lack of it… Don’t let the price tags fool you! There are plenty of excellent machines available for under $1000, and a few of them can be had for under $600. Don’t think that you need to spend $2,000 or higher to really get involved with a quality 3d printer. We just bought a printer for under $300 and it came assembled! But we know its limitations and will only use it for select filaments and parts. There’s another printer that we purchased for over $1000. It had to be upgraded so much that it doesn’t look anything like the original machine we bought. The only good thing is that it taught us so much more about what we needed, didn’t need, the machine and the process of 3d printing. Others that we have seen and used would be been better dropping off at the landfill than in my shop. It all comes back to reading reviews, all the options available and what you need to print.
[/bs_citem]
[/bs_collapse]
Thanks for reading. If you have any questions contact us at support@rdmfilament.com or support@fubarglue.com.
Please visit our sites: www.RDMFilament.com & www.FubarGlue.com. You can find more information on our great Nylon 12 Filament with all of its great characteristics. By the way, we are the only business selling this material in the U.S.! Also check out our Fubar Glue. Whenever you have 3d prints lifting and warping use Fubar Glue to make sure it stays attached to your 3d printer bed. Remember it’s non-toxic and works great on most filaments and printer bed materials on the market today.